Classic Peanut Brittle: A Timeless Treat
Introduction
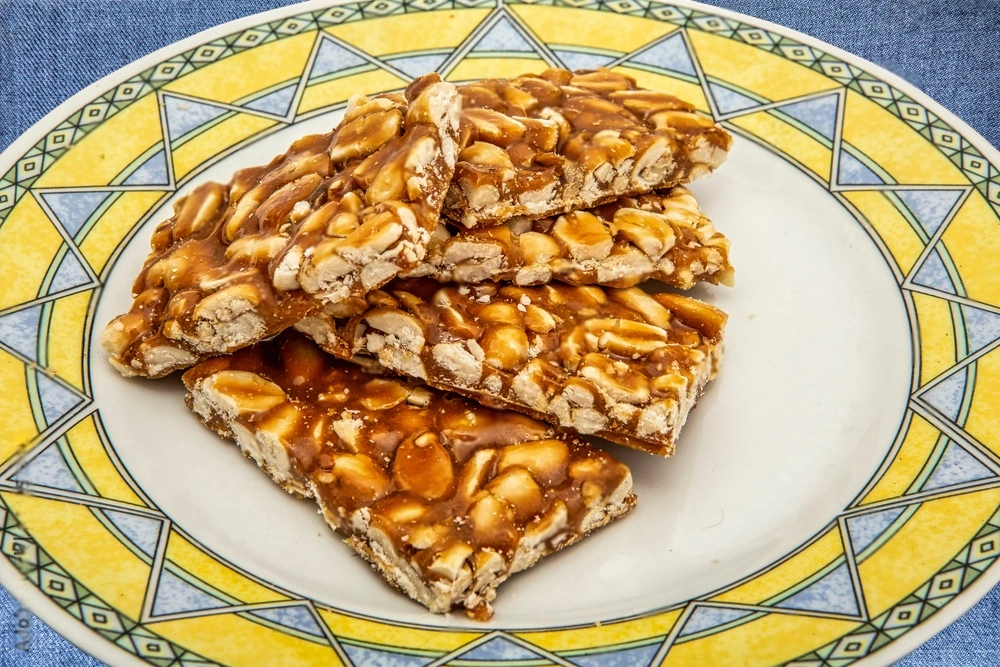
With its delightful combination of crunchy caramel and roasted peanuts, Peanut brittle has been a beloved confection for generations. In this article, we will take a lovely journey into the world of classic Peanut brittle, exploring its history, the art of making it, and why it continues to be a favorite treat for many. Join us as we uncover the secrets behind this timeless classic.
Recipe
Ingredients:
2 cups granulated sugar
1 cup light corn syrup
1/2 cup water
1/4 teaspoon salt
2 cups roasted peanuts
Two tablespoons unsalted butter
One teaspoon of vanilla extract
One teaspoon of baking soda
Directions:
Grease a large baking sheet or line it with parchment paper. Set it aside.
Combine the granulated sugar, light corn syrup, water, and salt in a large saucepan. Stir well to dissolve the sugar.
Place the saucepan over medium heat and cook, stirring occasionally, until the mixture reaches a temperature of 240°F (115°C) on a candy thermometer.
Stir in the roasted peanuts and continue cooking, stirring constantly, until the temperature reaches 300°F (150°C).
Remove the saucepan from the heat and quickly stir in the unsalted butter, vanilla extract, and baking soda. The mixture will bubble up, so be cautious.
Immediately pour the hot Peanut brittle onto the prepared baking sheet, spreading it evenly with a heat-resistant spatula.
Let the peanut brittle cool completely at room temperature until it hardens and becomes flaky.
Once cooled and hardened, break the Peanut brittle into small pieces.
Store the Peanut brittle in an airtight container at room temperature.
Prep Time: 10 minutes | Cooking Time: 15 minutes | Total Time: 25 minutes
Kcal: 120 kcal | Servings: Approximately 20 servings
The History of Peanut Brittle
A Sweet Origin
Peanut brittle’s origins can be traced back to ancient times. Its roots lie in various sweet nut-based confections in regions like India and the Middle East. These early versions were made with nuts, honey, and different spices.
The American Evolution
As we know it today, Peanut brittle gained popularity in America during the 19th century. With the widespread cultivation of peanuts, this treat became more accessible. It quickly became a staple at fairs, carnivals, and holiday gatherings.
Ingredients You’ll Need
1. Peanuts
The star of the show, peanuts add a rich, nutty flavor and a satisfying crunch to the brittle.
2. Sugar
Sugar is the primary ingredient that turns into the sweet, golden caramel that coats the peanuts.
3. Corn Syrup
Corn syrup helps prevent crystallization, ensuring a smooth texture in your Peanut brittle.
4. Baking Soda
A pinch of baking soda creates tiny air bubbles, giving your brittle that signature light, airy texture.
How to Make Classic Peanut Brittle
Step 1: Prepare Your Ingredients
Before you embark on your Peanut brittle-making adventure, it’s essential to ensure you have all the ingredients and equipment ready. This step sets the stage for a smooth cooking process.
1.1 Peanuts
Peanuts, the show’s star, is the heart and soul of classic Peanut brittle. You can use either raw or roasted peanuts, depending on your preference. Raw peanuts provide a fresher, nuttier flavor, while roasted ones impart a more profound, smokier taste. Ensure you have about a cup and a half of these delicious legumes ready for action.
1.2 Sugar
Sugar is the primary ingredient that will transform into the sweet, golden caramel that coats your peanuts. Granulated white sugar is the go-to choice for most recipes. It’s readily available and creates a beautiful golden hue. You’ll need a generous amount of sugar, typically around two cups, to achieve the desired sweetness.
1.3 Corn Syrup
Corn syrup is a critical component in Peanut brittle, which prevents crystallization. This results in a smooth and consistent texture throughout your brittle. Light corn syrup is commonly used for its neutral flavor and effectiveness in candy-making. You’ll want about half a cup of this syrup on hand.
1.4 Baking Soda
A tiny pinch of baking soda is the secret to creating those tiny, delicate air bubbles that give your Peanut brittle its characteristic light and airy texture. Ensure you have a teaspoon of baking soda ready to add at just the right moment.
1.5 Parchment Paper and Baking Sheet
To avoid sticky situations later on, line a baking sheet with parchment paper. This will make it much easier to remove your Peanut brittle once it has cooled and set. Make sure you have a large baking sheet to spread your brittle mixture evenly.
With all these ingredients ready, you’re well-prepared to embark on the delightful journey of crafting your batch of classic Peanut brittle. Each component is vital in creating the perfect balance of sweet, nutty, and crunchy, ensuring that your Peanut brittle will be nothing short of spectacular. So, gather your supplies and get ready to transform these simple ingredients into a delectable treat that will impress family and friends alike.
Step 2: Cook the Sugar Mixture
Now that you’ve gathered your ingredients and prepared your workspace, it’s time to start creating the sweet, golden caramel that will coat your peanuts and turn them into irresistible Peanut brittle.
2.1 Use a Heavy-Bottomed Saucepan
Begin by selecting a heavy-bottomed saucepan. The heavy bottom ensures even heat distribution and prevents hot spots that could cause your sugar mixture to scorch. Choose a large saucepan to accommodate your ingredients comfortably; this will help avoid boil-overs as the mixture heats up.
2.2 Combine Sugar and Corn Syrup
In your saucepan, combine your previously measured sugar and corn syrup. The sugar provides the sweetness, while the corn syrup helps prevent crystallization, resulting in a smoother texture.
2.3 Heat Over Medium Flame
Place the saucepan over medium heat on your stovetop. You’ll want to stir the mixture continuously with a wooden or silicone spatula. The sugar gradually dissolves into the corn syrup as the mixture heats, creating a thick, amber-colored liquid.
2.4 Observe the Color Change
As you continue to stir, watch for the transformation of the mixture from a clear syrup to a rich amber hue. This is where the magic happens! The sugar and corn syrup combine to form a luscious caramel enveloping your peanuts.
2.5 Patience is Key
Be patient during this step. The sugar mixture may take several minutes to reach the desired color and consistency. Avoid increasing the heat; a steady, medium heat prevents scorching.
2.6 The Amber Test
To check if your sugar mixture is ready, you can perform the “amber test.” Dip a spoon into the mixture and allow a few drops to fall into a bowl of cold water. Your caramel is good to go if the drops form complex, brittle threads that break when bent.
2.7 Remove from Heat
Remove the saucepan from the heat source immediately once your sugar mixture achieves the perfect amber color and passes the amber test. Overcooking can result in a bitter taste, so timing is crucial.
2.8 Ready for the Next Step
With your sugar mixture beautifully caramelized, you can move on to the next step: incorporating the peanuts and creating that iconic Peanut brittle crunch. Stay vigilant during this step, as the caramel can be pretty hot. Handle with care as you add the peanuts and continue the journey towards creating a delectable treat that’s sure to impress.
Making Peanut brittle is as much about the process as the result. Enjoy the sights and sounds of the caramelization process, and relish the anticipation of savoring your homemade classic Peanut brittle.

Step 3: Add the Peanuts
With your sugar mixture transformed into a luscious amber caramel, it’s time to introduce the star of the show—your peanuts. This step is where the magic starts to happen.
3.1 Stir in the Peanuts
Carefully and swiftly, add the peanuts to the caramelized sugar mixture in your saucepan. Stir vigorously with your wooden or silicone spatula to ensure each Peanut is thoroughly coated in the sweet, amber caramel.
3.2 Achieve a Uniform Mixture
You aim to achieve a uniform mixture where the peanuts are evenly distributed and surrounded by caramel goodness. Continue to stir for a few more minutes over low to medium heat. This helps infuse the peanut flavor into the caramel and ensures that each nut is beautifully coated.
3.3 Monitor the Texture
As you stir, pay attention to the texture of the mixture. It should become glossy and smooth, with the peanuts glistening in the caramel. This glossy appearance indicates that the peanuts are fully coated and that the brittle will have that signature sheen when it sets.
3.4 Watch for Changes in Color
You may notice a slight color change while the peanuts are being integrated into the mixture. The caramel may deepen to a rich, golden brown, enhancing the overall flavor of your Peanut brittle.
3.5 Quick Work
This step requires quick work. The caramel can set rapidly, so you want to ensure the peanuts are evenly distributed and coated before it cools and hardens.
3.6 Remove from Heat
Remove the saucepan from the heat source once you’re satisfied that the peanuts are well-coated and the mixture is uniform. You’re now ready for the next crucial step: incorporating the baking soda to create that airy, delicate texture that makes classic Peanut brittle irresistible.
With the peanuts perfectly enrobed in caramel, you’re well on your way to creating a sweet treat that captures the essence of nostalgia and delight. The mixture in your saucepan promises crunchy, lovely, and nutty bliss, and the next step will bring you closer to that final, delectable result. Stay tuned as we craft your batch of classic Peanut brittle.
Step 4: Add Baking Soda
It has troubled your peanuts with the rich, golden caramel. No, in the previous step, it’s time to introduce a secret ingredient to give your Peanut brittle its signature light and airy texture—baking soda.
4.1 Be Swift and Precise
Adding baking soda is critical in making Peanut brittle, so you’ll need to act swiftly and precisely.
4.2 Remove from Heat
Start by removing the saucepan from the heat source. The caramel mixture will be hot, so exercise caution while handling it.
4.3 Add the Baking Soda
With the saucepan removed from the heat, sprinkle a teaspoon of baking soda evenly over the caramel and peanut mixture.
4.4 Watch It Bubble
As soon as the baking soda comes into contact with the hot caramel, it will bubble up and create a light, frothy foam. This bubbling action will give your Peanut brittle its airy, delicate texture.
4.5 Stir Gently
Using your spatula, gently stir the mixture to incorporate the baking soda. You’ll notice that the mixture will become lighter in color and expand in volume.
4.6 Work Quickly
This step requires working quickly because the mixture will start to set after adding the baking soda. Stir just enough to ensure that the baking soda is evenly distributed.
4.7 Prepare for Pouring
Once the baking soda is well mixed in, you’re ready for the next and final step: pouring the mixture onto the prepared baking sheet and allowing it to cool and set.
4.8 Ready for the Next Stage
Now that the baking soda is incorporated, your peanut brittle mixture can transform into a crunchy, airy delight. Adding baking soda is the secret behind that satisfying snap and melt-in-your-mouth quality, making classic Peanut brittle irresistible.
Stay with us as we create your batch of this beloved confection. The next step will bring your Peanut brittle closer to becoming a delectable treat ready for sharing and savoring.
Step 5: Spread and Cool
Now that your Peanut brittle mixture is perfectly prepared, it’s time to allow it to set and solidify into the delectable, crunchy treat you’ve been working towards.
5.1 Prepare Your Baking Sheet
First, ensure that your baking sheet, previously lined with parchment paper, is ready and waiting. This parchment paper will prevent the Peanut brittle from sticking to the sheet, making it much easier to remove once it has set.
5.2 Pour the Mixture
Carefully and swiftly, pour the hot, bubbling peanut brittle mixture onto the parchment paper-lined baking sheet. Use your spatula to spread evenly, creating a thin, flat layer.
5.3 Work Quickly
This step requires working quickly, as the Peanut brittle will begin to cool and harden rapidly. Be cautious, as the mixture will still be hot.
5.4 Flatten and Shape
Use the spatula to flatten and shape the brittle mixture to your desired thickness. A thickness of around 1/4 to 1/2 inch is commonly preferred, but you can adjust it according to your taste.
5.5 Allow to Cool
Now, it’s time to let nature do its work. Allow the Peanut brittle to cool completely at room temperature. This cooling process typically takes about 1 to 2 hours, depending on the thickness of your brittle and the ambient temperature.
5.6 The Set Test
You’ll know your Peanut Brittle is ready when completely cooled and set. Gently tap it with a spoon or fingertip; it should produce a satisfying, brittle sound.
5.7 Break into Pieces
You can break it into pieces once your Peanut brittle has cooled and set. Lift the parchment paper; the brittle should easily break into shards or bite-sized portions.
5.8 Enjoy!
Now, your classic Peanut brittle is ready to enjoy. Savor the sweet, nutty crunch and share it with friends and family. It’s the perfect treat for gatherings, gifts, or indulgent moments of self-enjoyment.
Congratulations, you’ve successfully navigated each step of creating this timeless confection, from caramelizing the sugar to adding the baking soda and spreading it to cool and set. Your homemade classic Peanut brittle is a testament to patience and craftsmanship, resulting in a delightful treat that captures the essence of tradition and sweetness. Enjoy every delicious bite!
Why Peanut Brittle Endures
Nostalgia
For many, Peanut brittle evokes fond memories of family gatherings, making it a sentimental favorite.
Sweet and Savory
Combining sweet caramel and salty peanuts offers a satisfying contrast of flavors and textures.
Versatility
Peanut brittle isn’t just for snacking. It can be crumbled over ice cream, used as a dessert topping, or incorporated into recipes.
Health Benefits of Peanuts in Classic Peanut Brittle
While classic Peanut brittle is undoubtedly a sweet indulgence, it’s worth noting that the star ingredient, peanuts, brings some health benefits to the table:
1. Rich in Healthy Fats
Peanuts are a great source of monounsaturated and polyunsaturated fats, which are considered heart-healthy. These fats can help lower harmful cholesterol levels and reduce the risk of heart disease.
2. A Good Source of Protein
Peanuts are relatively high in protein, making them a satisfying snack that can help curb hunger and promote weight management. Protein is also essential for muscle growth and repair.
3. Packed with Vitamins and Minerals
Peanuts contain various vitamins and minerals, including vitamin E, magnesium, and potassium. These nutrients are essential in maintaining overall health, including supporting the immune system and maintaining healthy bones.
4. Rich in Antioxidants
Peanuts are rich in antioxidants, particularly resveratrol. Antioxidants help combat oxidative stress in the body and may contribute to a lower risk of chronic diseases.
5. Supportive Blood Sugar Control
Despite their natural sweetness, peanuts have a relatively low glycemic index. This means they have a slower impact on blood sugar levels, making them suitable for individuals with diabetes or those looking to manage their blood sugar.
6. Aid in Weight Management
The combination of healthy fats, protein, and fiber in peanuts can help you feel full and satisfied, reducing the likelihood of overeating. This can be beneficial for those aiming to maintain or lose weight.
While it’s essential to enjoy classic peanut butter in moderation due to its sugar content, you can take comfort in knowing that its peanuts provide a range of potential health benefits. So, indulge in this beloved treat occasionally and savor its sweetness and the goodness of peanuts.
Conclusion
In conclusion, classic Peanut brittle is a treat that transcends time. Its rich history, simple ingredients, and delightful taste continue to make it a cherished indulgence. So why not try making a batch of homemade Peanut brittle? It’s a sweet adventure that’s worth every crunchy bite.
FAQs (Frequently Asked Questions)
- Can I use other nuts in Peanut brittle? Yes, you can experiment with nuts like almonds, cashews, or pecans to create unique variations of brittle.
- How do I store Peanut brittle to keep it fresh? Store your Peanut brittle in an airtight container at room temperature. It can last for several weeks if properly sealed.
- Can I make peanut butter without corn syrup? While corn syrup helps prevent crystallization, you can substitute it with honey or maple syrup for a slightly different flavor.
- What causes Peanut brittle to become too hard or too sticky? Overcooking the sugar mixture can result in a brittle that’s too hard while undercooking can make it too sticky. It’s essential to follow the recipe closely.
- Is Peanut brittle gluten-free? Yes, classic Peanut brittle is typically gluten-free, but always check your ingredients, especially if you have gluten allergies or sensitivities.